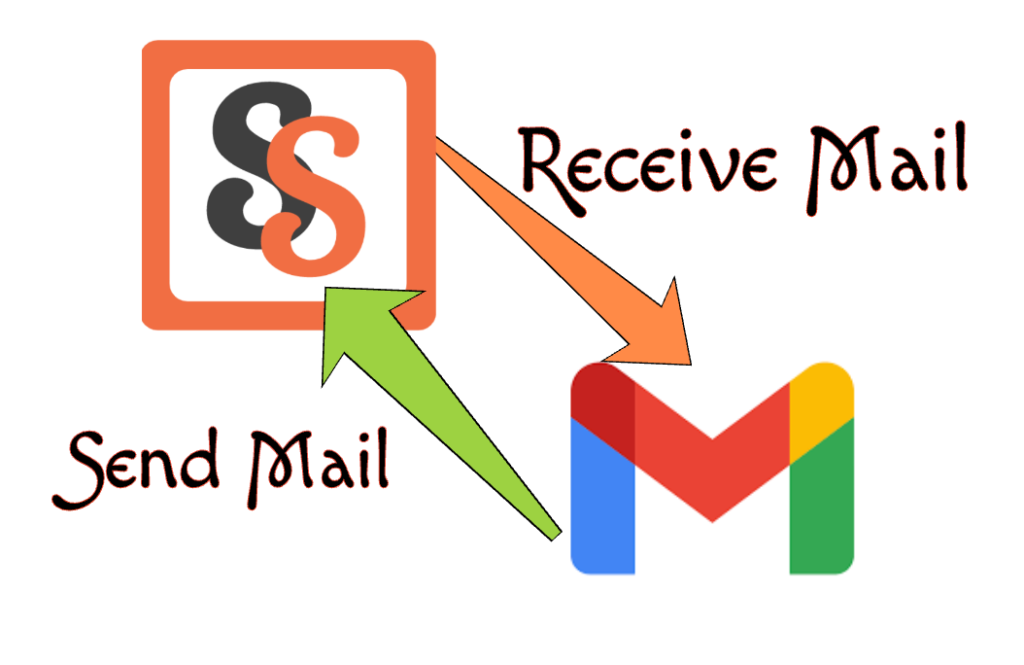
As a web developer, managing multiple email accounts can be a challenge. Many individuals and businesses choose to set up their own email servers for greater control and customization. However, it can be beneficial to forward emails from a self-hosted email to a more user-friendly email service like Gmail. In this blog post, we will explore the steps to forward emails from a self-hosted email to Gmail, allowing you to centralize your email management and take advantage of Gmail’s powerful features.
Step 1: Set Up a Gmail Account (if you don’t have one): If you don’t already have a Gmail account, you’ll need to create one. Go to the Gmail signup page and follow the instructions to create a new account. Make sure to choose a secure password and enable two-factor authentication for added security.
Step 2: After creating the account, enable POP/IMAP Access on Your Self-Hosted Email Server: To forward emails from your self-hosted email to Gmail, you’ll need to enable either POP (Post Office Protocol) or IMAP (Internet Message Access Protocol) access on your email server. Check your email server’s documentation or contact your hosting provider for specific instructions on enabling POP/IMAP access.
Configuring Self-Hosted Email Server
Step 3: Configure Email Forwarding on Your Self-Hosted Email Server: Once POP/IMAP access is enabled, you can configure email forwarding on your self-hosted email server. The exact steps may vary depending on the server software you’re using (e.g., Postfix, Exim, Sendmail). Here’s a general guide:
- Log in to your self-hosted email server’s control panel or administration interface.
- Locate the email forwarding settings. This may be under “Mail Forwarding,” “Email Forwarding,” or a similar option.
- Enter your Gmail email address as the forwarding destination. For example, yourname@gmail.com.
- Save the changes and exit the control panel.
Configuring Gmail
Step 4: At this step, configure Gmail to Retrieve Emails from Your Self-Hosted Email: Now it’s time to configure Gmail to retrieve emails from your self-hosted email server. Follow these steps:
- Log in to your Gmail account.
- Click on the gear icon in the top-right corner and select “Settings” from the dropdown menu.
- In the Settings menu, click on the “Accounts and Import” tab.
- In the “Check mail from other accounts” section, click on “Add a mail account.”
- A pop-up window will appear. Enter the email address of your self-hosted email account and click “Next.”
- Select “Import emails from my other account (POP3)” and click “Next.”
- Enter the necessary details of your self-hosted email account, including the username, password, POP server, and port number.
- You may need to consult your hosting provider or email server documentation for these details.
- Choose the desired options for importing, such as whether to label incoming messages and whether to leave a copy of retrieved messages on the server.
- Click “Add Account” to finish the setup process.
Finally…
Step 5: Test and Verify Email Forwarding: To ensure that email forwarding is working correctly, send a test email to your self-hosted email address. If everything is set up correctly, the email should be forwarded to your Gmail account. Check your Gmail inbox for the forwarded email, and verify that the sender, subject, and content are as expected.
By following the steps outlined above, you can easily forward emails from a self-hosted email to Gmail. This enables you to consolidate your email management, benefit from Gmail’s robust features, and enjoy a user-friendly interface. Remember to periodically check your self-hosted email account to ensure that forwarded messages are being delivered correctly. With this setup, you can streamline your email workflow and enhance productivity as a web developer or business professional.